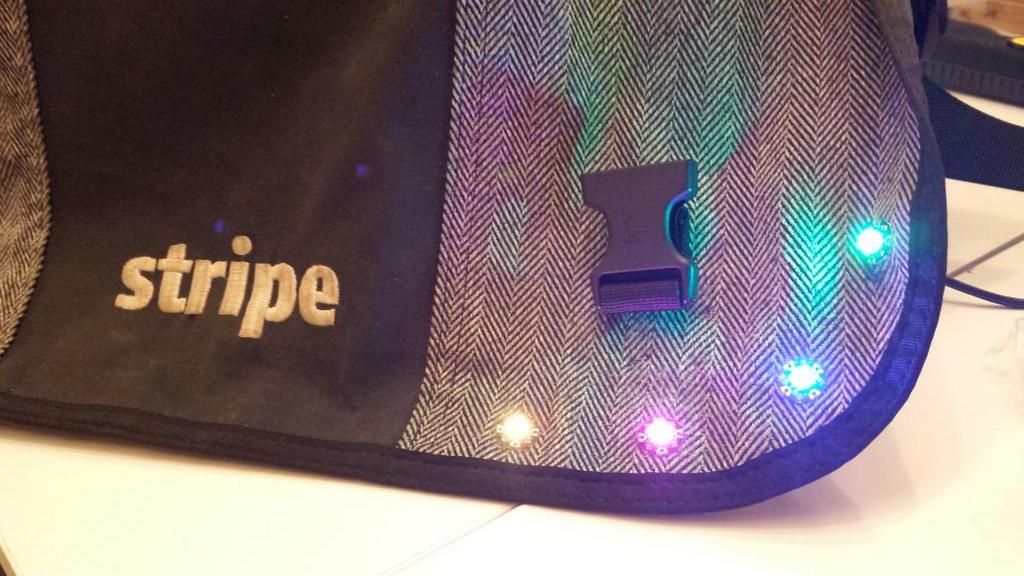
LED Messenger Bag

Lights in Action
At Grace Hopper this year, I stumbled on a party hosted by Google/Women Techmakers, working with a local hackerspace. They were handing out fantastic little arduino/wearables starter kits, put together by Adafruit. I’ve always wanted to throw blinky lights on my messenger bag, since I bike with it fairly often, and want to be as obnoxiously visible as possible.
Materials
- one bag to turn sparkly (I used my Stripe-branded Timbuk2)
- conductive thread
- clear nail polish
- Gemma
- 4 Neopixels
- coin cell battery case (optional – you can plug into your laptop, instead)
Process
-
Mark where you want your LEDs to go on your bag. Remember that the buckle might cover the LEDs, depending on placement. (Whoops.)
-
Mark where you want your Gemma to go on the inside of the bag.
-
Thread your needle with conductive thread, and connect the components. I started by running the positive and ground lines first, then connected the data lines. A point of caution – remember to not sew continuously for the data line. I had a brainfart, and decided that I didn’t want to tie off between every LED. Derp. I followed this tutorial, but omitted the embroidery hoop since my messenger bag’s fabric was fairly stiff.
-
With a scrap piece of fabric, sew on a pouch to hold your battery pack in place.
-
IT’S ALIVE. Use the Neopixel strand test from Adafruit’s arduino library to have your bag go through a bunch of different light effects.
Troubleshooting
-
Is your positive rail at 5V? (There’s a 3.3V output on the chip, too, which you may have connected to instead.)
-
Does your data line serially connect all the LEDs? Don’t be me.
-
Check the direction of the data line. It’s easy to accidentally connect to the output instead of the input.
Future Steps
I’m not sure where I want to take this next. I could add a light sensor, so the bag knows to turn on as it gets dark. I could turn it into a turn signal – add 4 LEDs on the other side of the bag, and an RF receiver, so I can use a transmitter on my handlebars.